
HOW TO SET UP A MACRO ALGAE TANK: A STEP-BY-STEP GUIDE
If you're thinking of setting up a macro algae tank, as your first steps into the saltwater side of the aquarium hobby you’ve made the right choice! Macro Algae tanks are a great way to get started, don’t cost much to set up and are really forgiving of mistakes. So in this guide, I’ll walk you through the process based on my first-hand experience.
How to Set up a Macro Algae Tank on a Budget
A lot of people believe that setting up a saltwater aquarium is both expensive and complicated. However, advances in technology and science have made it much more accessible in recent years. While maintaining corals requires more effort and can get pricey if you're after rare species, macro algae tanks are far more affordable and low-maintenance. In fact, I find them no more challenging than maintaining a well-designed freshwater aquascape.

Setting up a macro algae tank - step by step guide
What You Need:
Here’s the basic list of equipment and materials for a macro algae tank. I highly suggest hunting around local Facebook groups and similar second-hand places to pick up lots of cheap stuff. You’ll be surprised by what you find!
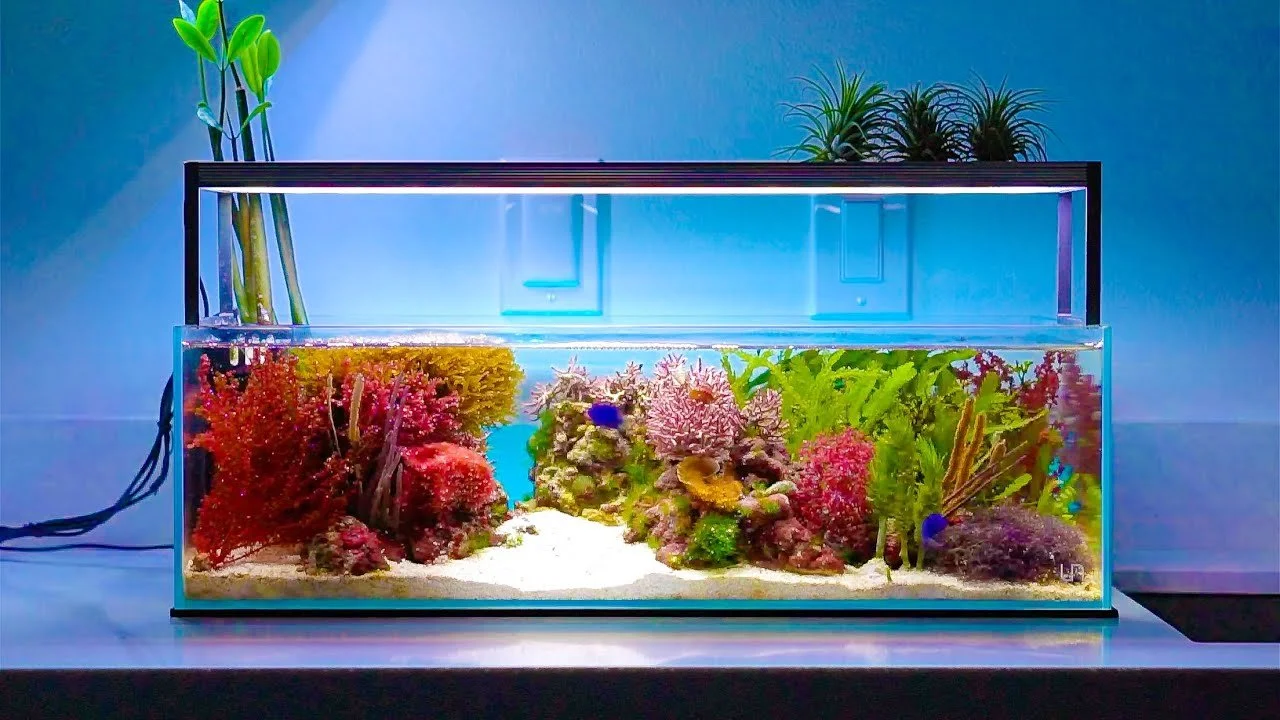
Aquarium (any size will do) I’d probably start with a 10-gallon 45-liter tank personally.
Filter a Wave Maker (Hang on back filters work best)
An aquarium Light (Pretty much anything will work) You don’t need a reef light.
Heater
Salt for making saltwater
Refractometer (To check salinity)
Aragonite Sand (or similar reef sand)
Reef Rock
Macro Algae (whatever types you like)
OPTIONAL (Auto Top off Unit) ATO
How I set up my Macro Algae Tank (Step by Step Guide)
Step 1: Set Up the Tank
Position your tank where you want it to be displayed and make sure that it doesn’t get any direct sunlight. Once you have it set up you can add in a then layer of your chosen sand. I use aragonite sand most of the time with medium-sized grains but feel free to use whatever you like. Just make sure that you rinse the sand before you use it because it is usually really dusty.
If you’re thinking about getting some fish and inverts (shrimp, snails, etc) that like to dig make the sand bed a couple of inches deep. They’ll appreciate that.
Hardscape: Use your chosen reef rock to create caves and hides for the shrimp and fish. Just make sure to push the rocks into the sand bed so that they almost touch the glass to prevent them from collapsing when creatures dig around them. You don't want to make an amazing cave that collapses and crushes all your little critters. The part of the process is very personal so take your time to create something you like the look of.
Step 2: Fill the Tank with Water
Fill with saltwater: Now that you have your hardscape and basic set-up ready, you can make your saltwater. Simply read the requirements on the back of the salt brand you are using and mix up a batch of salt. Each brand differs a little so follow the instructions closely.
For the best, most stable results it’s best to pre-heat your water to 25c | 78f before adding your salt. To mix it in really well just drop a small pump or wave maker into your mixing bucket and leave it for 24 hours for the best results. However, I’ve mixed and used it within an hour without any issues. There are some really good video guides for different methods you can use on YouTube as well if you would like further details.
NOTE: RODI water is best for this, however, if your tap water doesn’t contain chlorine you can use that as well. Macro Algae isn’t as delicate as corals.
Add your Heater & Filter: When you have filled your tank to the level you want it at, add your heater and filter/wave maker and make the maximum water level with a pen. You always want to know what the max level is to account for evaporation.
IMPORTANT: As evaporation takes place, the salinity levels in the tank will start to rise so you will need to replace the missing water as often as possible using fresh water (not salt water). When water evaporates the salt is left behind in the tank so you don’t need to add any more. If you do you will increase salinity and kill everything.
Start Cycling Your Tank: Next, you’ll need to kick start the nitrogen cycle To boost the tank’s biological filtration, I added Seachem Stability and MicroBacter7. But the process is a little more involved so if you aren’t familiar with it the video below is perfect.
Step 4: Add Macro Algae
You have two different options now. You can add your macro algae already, or you can wait for your tank to cycle. I personally haven’t had any issues adding it right away though there is some risk involved with that as any ammonia spikes early on could potentially burn it. Generally, it takes about 6 weeks on average for a tank to cycle so that’s plenty of time to research some of the species of macroalgae you’d like to get started with.
I started with three types of macro algae:
Botryocladia (Red Grape)
Halymenia sp. (Dragon’s Tongue)
Caulerpa prolifera (which grows very quickly)

A yellow clown goby hiding near some Dragon's tongue macro algae
Step 5: Add Livestock
Once your tank is fully cycled you can add your chosen animals just make sure you research them really well before adding them to your new tank. Some species can be a little tricky to keep while others are easy but should be added at a later date. You can also add clown fish to a macro algae tank if that’s something you’ve always dreamed of having.
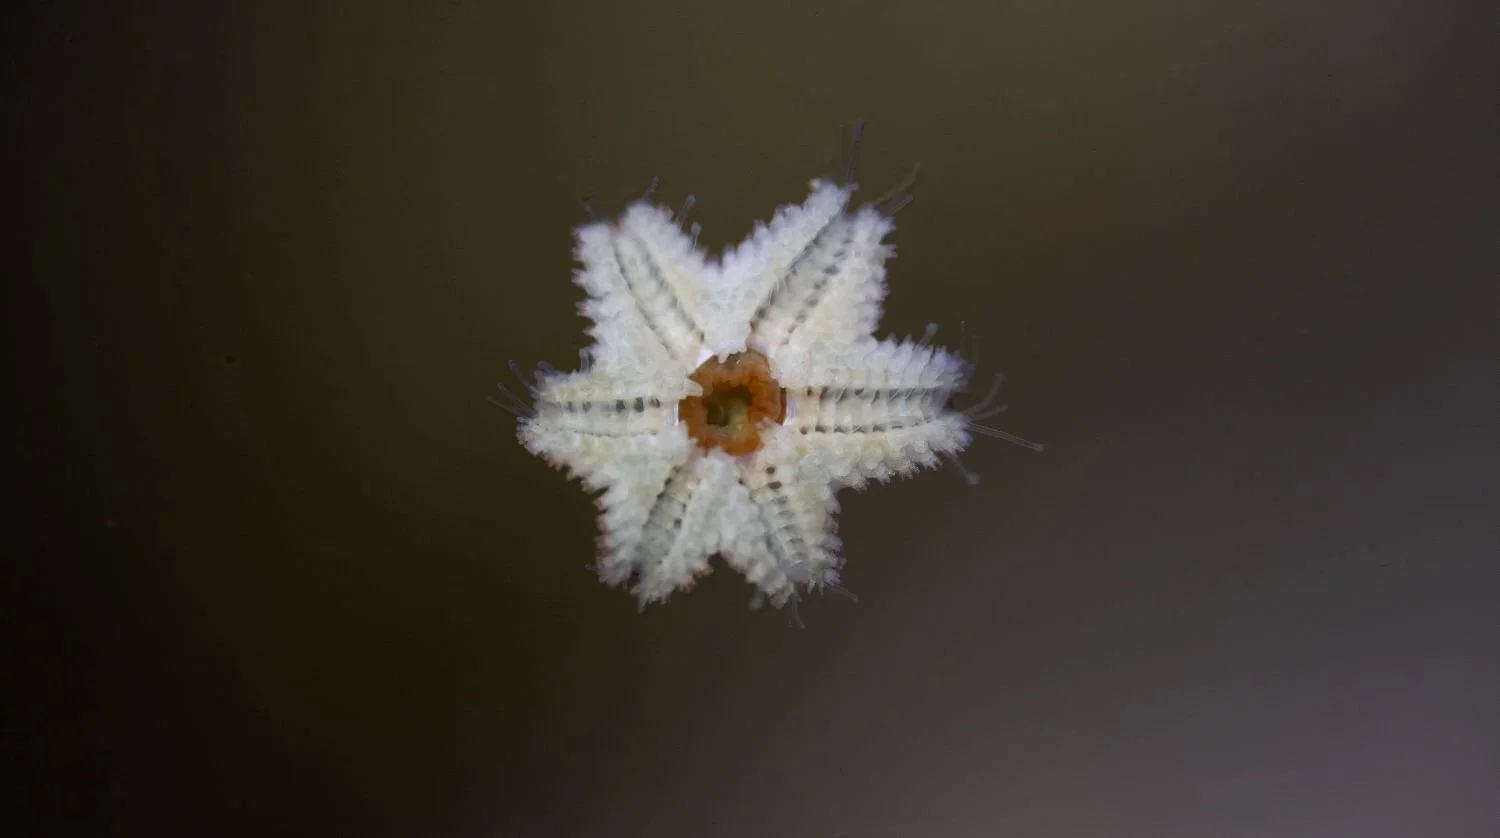
HITCHHIKERS: Most saltwater tanks, including mine, get surprise "hitchhikers." Some are pests and others are just annoying, though it’s always an experience to learn something new. Some of the creatures that have shown up in my tanks include:
Feather duster worms (harmless filter feeders)
Asterina starfish (pests to some but beneficial if you're considering Harlequin shrimp)
Micro jellyfish (tiny and harmless)
Brittle stars and various snails
Step 6: Monitor Water Parameters
That’s the hard part done! Now you just need to keep up with your regular maintenance, which is very similar to what you would be doing with a freshwater aquarium. Regular water changes. 20-30% every two weeks is usually enough and a fertilizer regime. Macro Algae is pretty hungry stuff so you’ll need to dose NO3 and PO4 based aquatic fertilisers at least once a week to keep things growing really nicely.
Water evaporation: As water evaporates, salinity levels rise. Make sure to top up the tank with freshwater to keep salinity stable. If you don’t want to do this manually you can get yourself an Auto Top off Unit (ATO) which will replace evaporated water automatically.
Make a habit of checking salinity levels and other tank parameters at least once a week. Twice during the first 2 months is best.