
HOW TO MAKE A SUPER CHEAP AQUARIUM & PALUDARIUM COOLING SYSTEM
How to make a cooling system for aquariums and paludariums
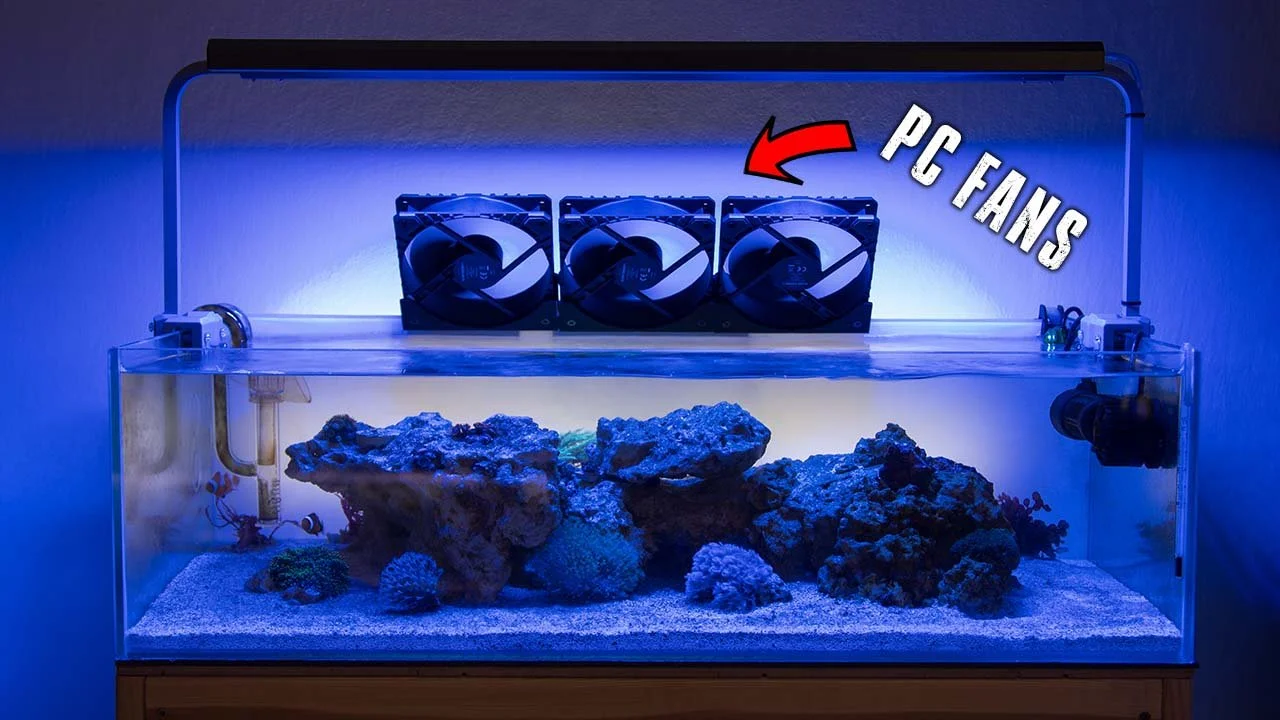
Hello everyone. As things are starting to heat up pretty early this year, I've decided it's time to make a DIY cooling system using some PC fans. While this system is primarily for my reef tank, you can use this exact same concept for any aquarium or paludarium.
However, if you're going to do this for a paludarium, it's probably better to set it up as a pull configuration, so it sucks air out rather than blows it in. This depends a little on your circumstances, so definitely experiment with it.
Complete Parts List for a DIY Tank Cooler
Make the voltage and sizes to the video data and choose your plug either US or EU
Power Adapter: 5.5x2.1 mm 12V 3A
4-Pin PWM Adapter: 5.5x2.1 mm DC adapter
3D Printer Files: (Check glass thickness)
PC FANS CHEAP: The cheapest option
PC FANS QUIET: The quietest option
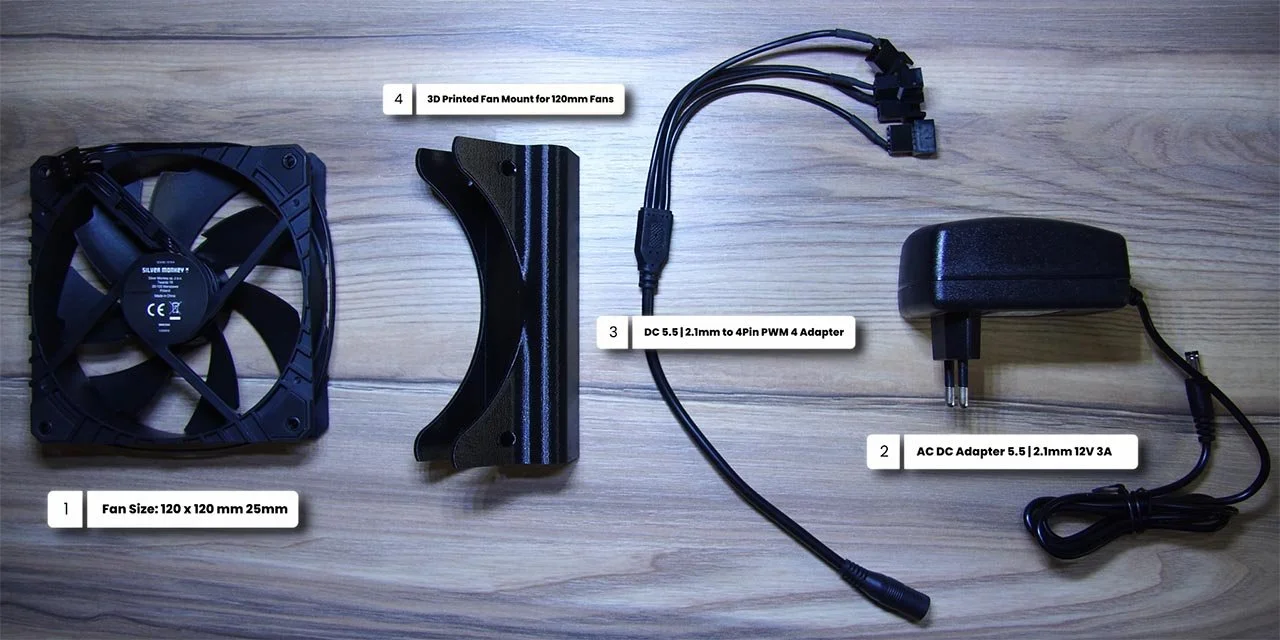
To begin, you'll need PC fans. I'm using 120 mm fans for this, but you can use bigger or smaller ones if you have those available. I'm using some cheap Silver Monkey fans; they are 120x120x25 with a rotational speed of 1,800 RPM, a max airflow of 61.7 CFM, and anti-vibration dampers. They’re also 4-pin PWM fans. If you’re looking for really quiet fans, I highly suggest "Be Quiet!" fans; I have ten in my current PC, and they're very quiet. So, if you want something that’s not going to make a lot of noise, "Be Quiet!" is definitely a good option.
In addition to the fans, you’ll also need a power adapter. I’m using a 5.5x2.1 mm 12V 3A adapter from AliExpress, and I'll leave a link in the description for the exact one I have. You’ll also need a 5.5x2.1 mm DC adapter to match your PWM fans. I’ll leave a link for that in the description as well. While I’m only using three fans for this build, I got a 4-way converter in case I want to add an extra one later.
For the final piece, I’m using a 3D-printed fan mount for 120 mm fans. I’ll leave the print files linked below so you can use the same file. Just make sure you choose the download for the glass thickness you have, as it comes in a few different sizes. I’m using 5 mm for this.
DIY Paludarium & Aquarium cooling system tutorial
Assembling Your DIY tank Cooling System
Now, it’s just a matter of screwing the fans to the mounts and connecting all the wires. When screwing the fans to the mounts, make sure the fan direction is facing the right way. For this to work best for an aquarium, ensure the fan is blowing air onto the water's surface rather than pulling air away; otherwise, you won’t get optimal results. For most fan brands, it’s usually the side with the less attractive design that should be facing out, but some are a bit different, so check before securing.
All three fans are now mounted to the 3D brackets and ready to connect. Now, connect the 4-pin PWM male to female just as shown on the screen. Connect all your fans, which for me is three, with one spare socket left if I decide to add another fan.
The final part is to connect the power adapter to the other connection, and that’s the entire process complete. We’ll test it quickly to ensure everything's working, and as you can see, all three fans are running perfectly. The only downside is if you've picked really loud, fast fans, they’ll be noisy, with no way to adjust the speed, as it will always be at maximum. So, choose your fans wisely.
Now that everything is connected, it’s time to mount it to the back or side of the aquarium and plug it in. This is a simple process: just slide it over the glass, connect everything up, and plug it straight into the power supply. Make sure not to dip anything in the water to avoid any issues.
Optimising Cooling and Power Consumption
Finally, I suggest running it on a timer during the hottest part of the day. For me, that will be from about 10 a.m. to 8 p.m., depending on the temperature.
However, the best way to control everything is with a temperature controller which will turn the fan on once the environment reaches a certain temperature. So for a few extra bucks, I suggest getting one.
Also, be mindful of evaporation, especially with reef tanks; increased airflow will lead to more evaporation, so if you don’t have an ATO, you’ll need to top up your tank regularly to keep salinity levels stable. I’ll be switching from my glass lid to a mesh lid for summer, which is another project for a future video.